How to Create Shops
Documentation types
- First, a client has to add an area for no point in creating an area if we don’t have a client. Each area will be controlled by one client.
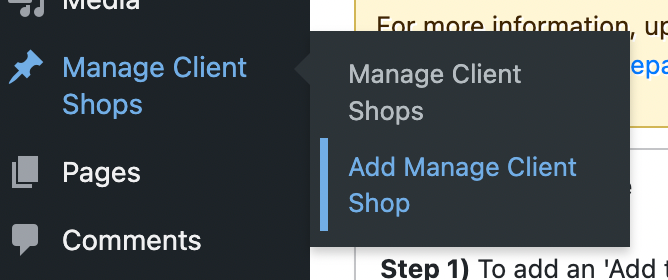
- In the case of https://test.yourmarketprice.com, the shops are areas. Add an area by selecting ‘add area’ to the item as shown below:
- Add shop/area to the site config. This is a manual process for now. Also, add the area/shop details.
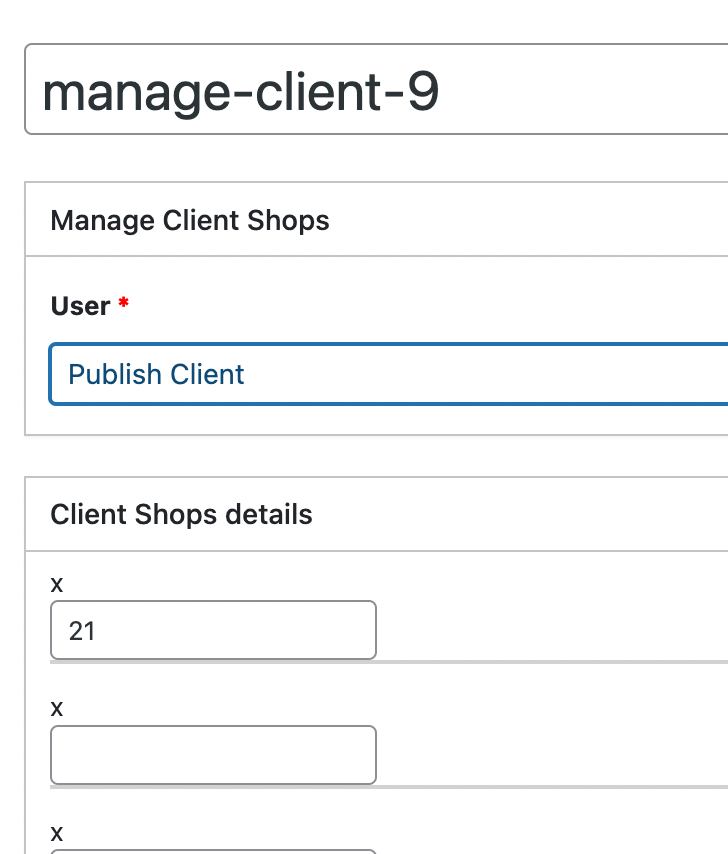
- Assign the shop to the client. In this step, we will link the shop to the client. A client may have more than one shop but a shop cannot have more than one clients
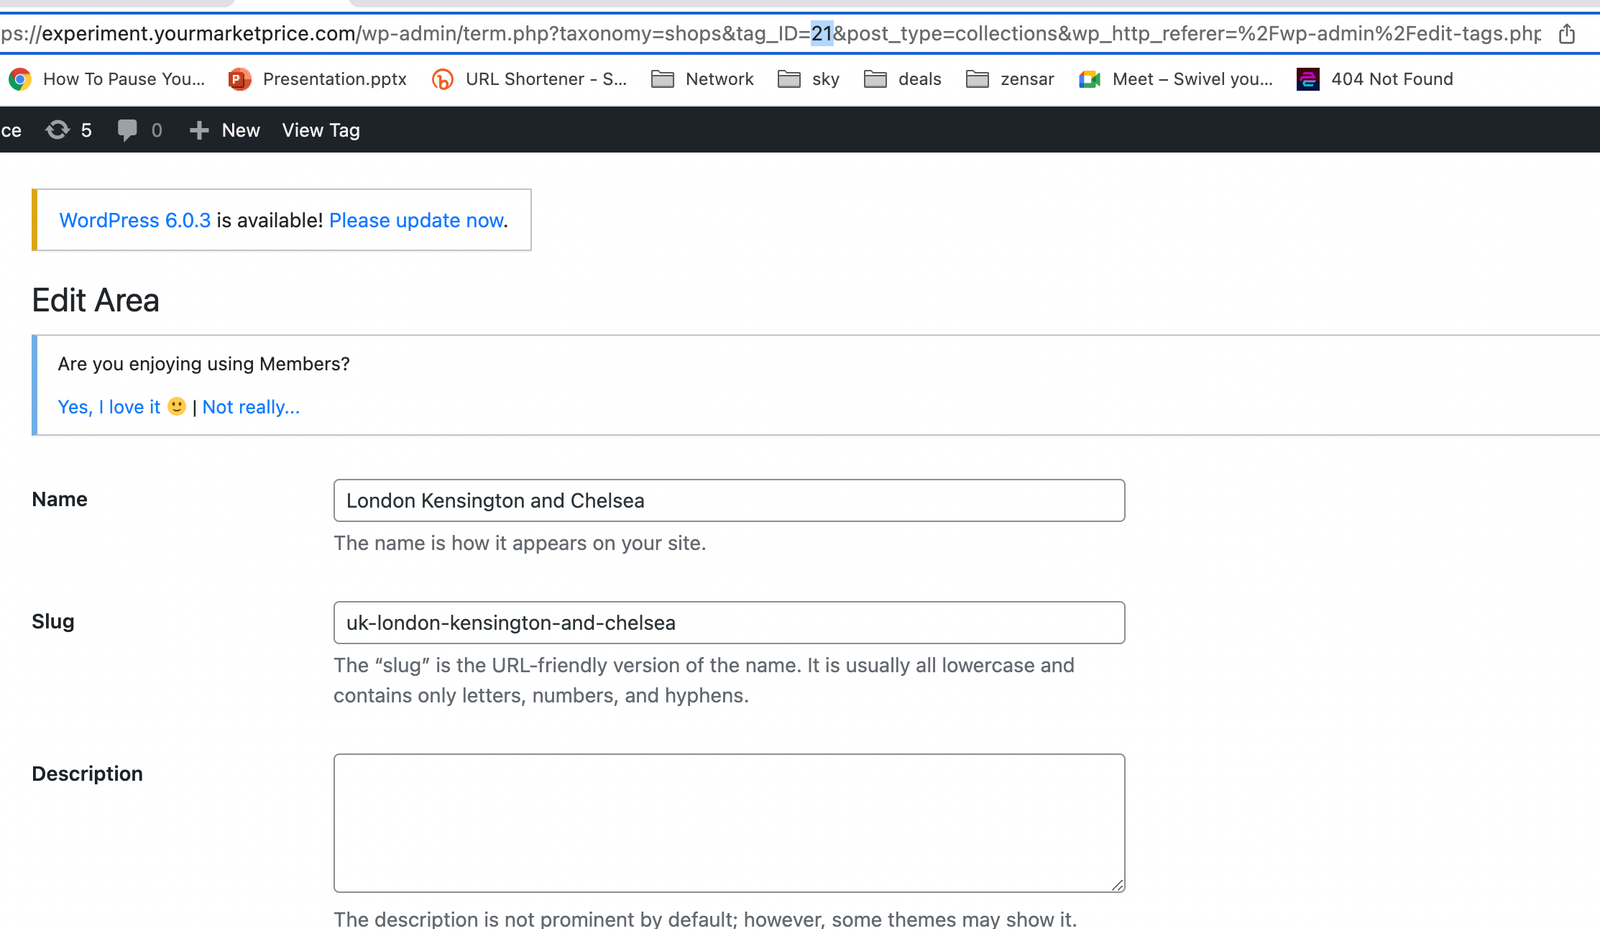
At this point, we will choose the client user ID and the shop user ID. All of this client’s shop will go on this post or it will be a duplicate of the client. The system will tell you that the client post here is duplicated so get rid of the duplicates. In the example below, the client is correctly assigned a shop: The client “Publish Client” was assigned shop/area 21. All of his shops will be assigned to this post. No need for another post for “Publish client”We can see here that the tag ID in the URL for shop/area London Kensington and Chelsea is 21 therefore Publish Client was assigned the shop/area 21 – London Kensington and Chelsea